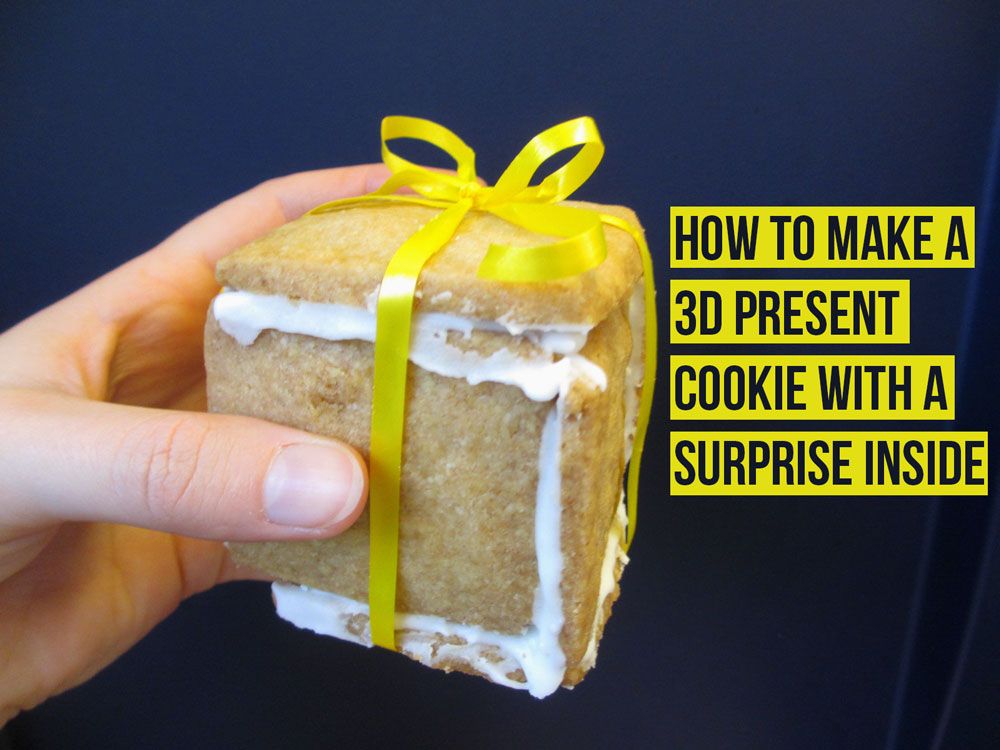
My little sister graduated. I took this as the perfect opportunity to experiment with an idea I have had for a while, but didn’t try yet. The idea: to bake a 3D cookie cube, and fill it with smarties. If you want to do the same, you can fill it with whatever you want: candy, a lovely note, another surprise or directions for where to find a present. I imagine these cookies would also be fun Christmas presents.
If you checked yesterday’s post, you will know I now have a place for you to check out the recipe for these cookies and for royal icing (it’s so convenient to be able to say that). As for the other instructions, you can find them below.
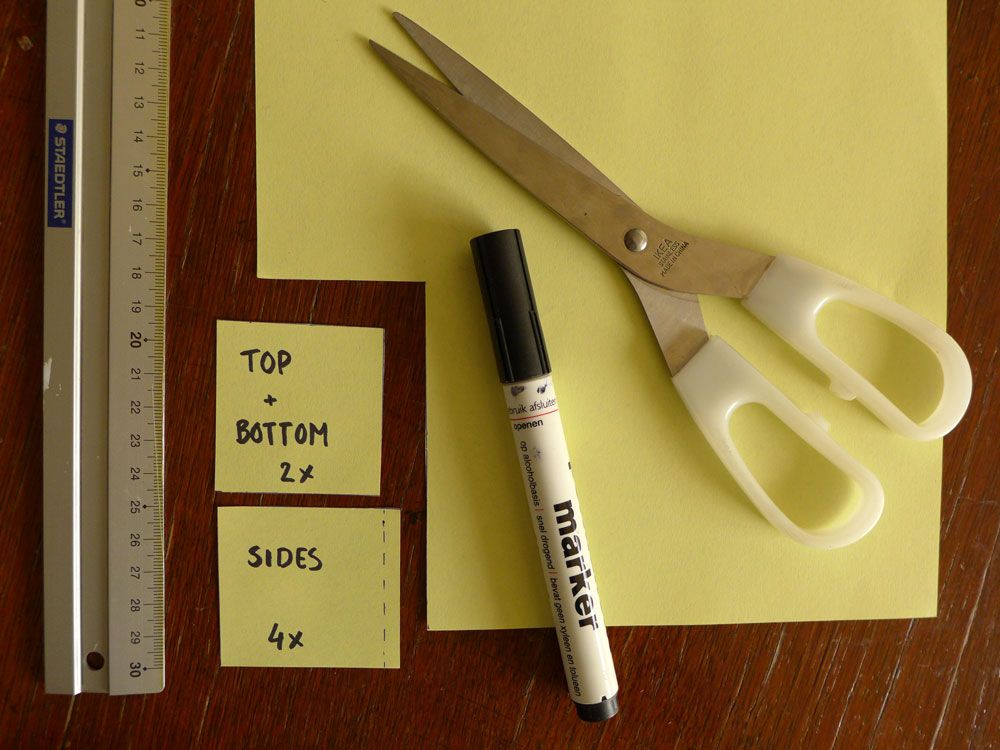 Start by measuring and cutting out your cookie shapes on paper. I used a square of 5 x 5 cm for the top and bottom. I figured I should make the sides of the cube a bit longer on one side, so there would be enough space to ‘glue’ them together later on. I didn’t really think it through though. It would have been better to make side rectangles slightly smaller, so there would have been relatively more bottom space for the sides to stand on. Also take into account that your cube will be higher than the height of your paper sides. In three dimensions the thickness of the top and bottom layer adds to the height of your sides. And don’t forget that your squares will become somewhat bigger as your cookies grow in the oven.
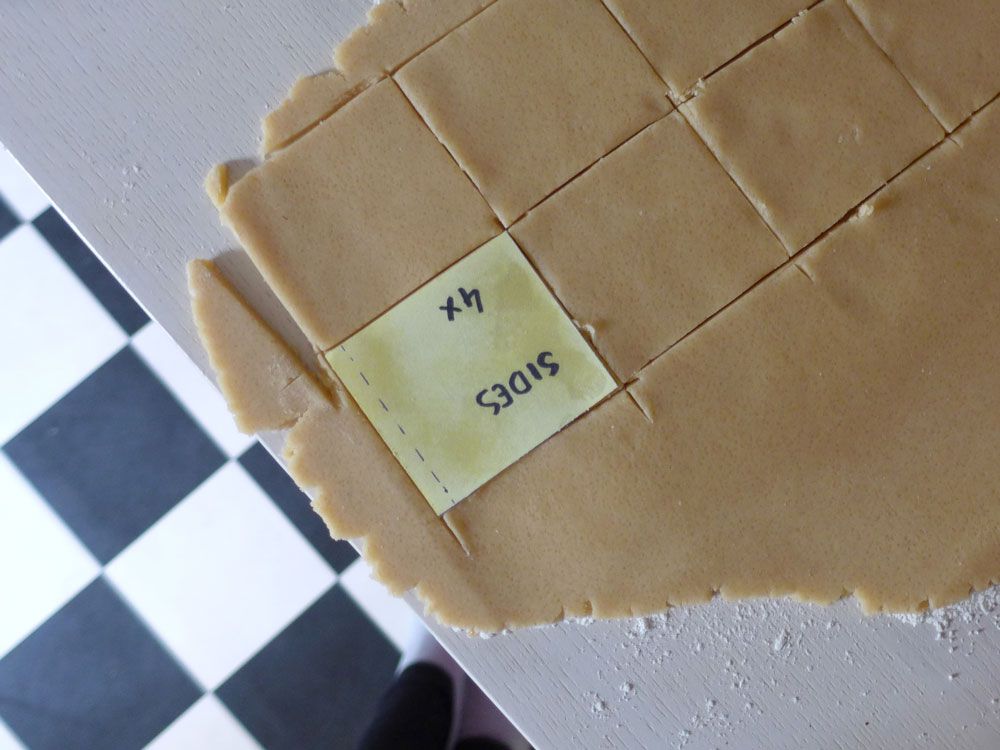 Make a batch of cookie dough and cut out your cookies. They will later become the sides of your cube/3D present. Remember to make a few additional rectangles/squares in case one of them accidentally breaks. When you’re done, bake your cookies in the oven.
 When the cookies have thoroughly cooled down, make royal icing. Carefully stick the sides of your cube to the bottom. Let it harden properly. This may take a while. Being in a hurry, like I was in this stage, isn’t recommended. I continued to the next stages before letting everything harden and cool off. Thankfully my present didn’t break down in the train towards my sister, but if you have the time I wouldn’t take the risk. your cookies may also end up somewhat less messy than mine that way.
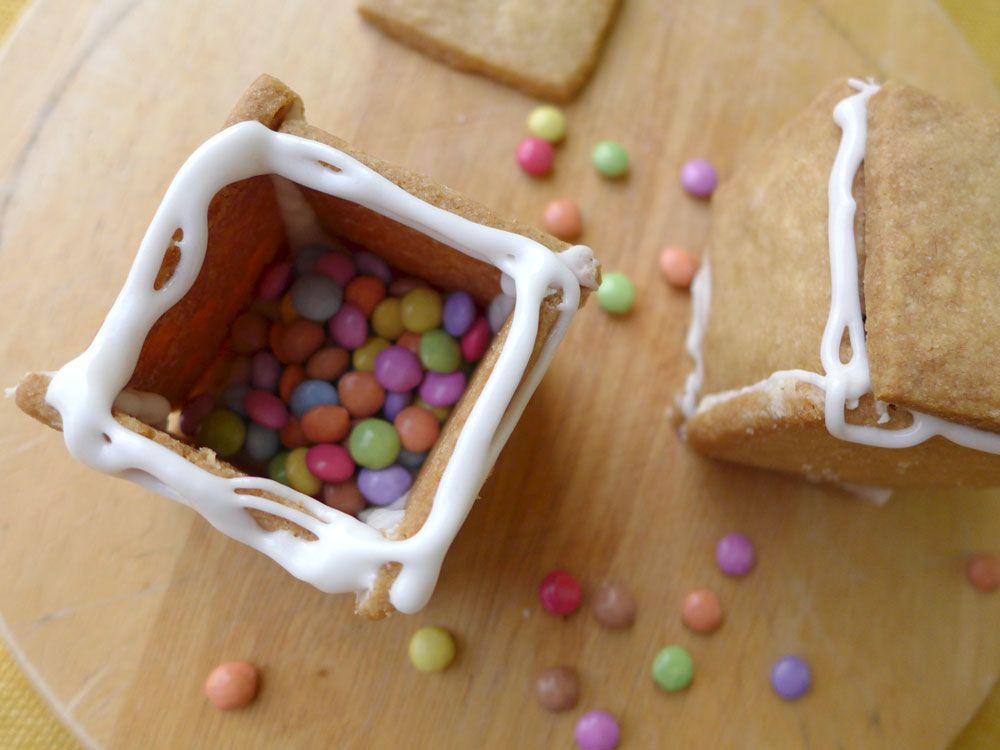
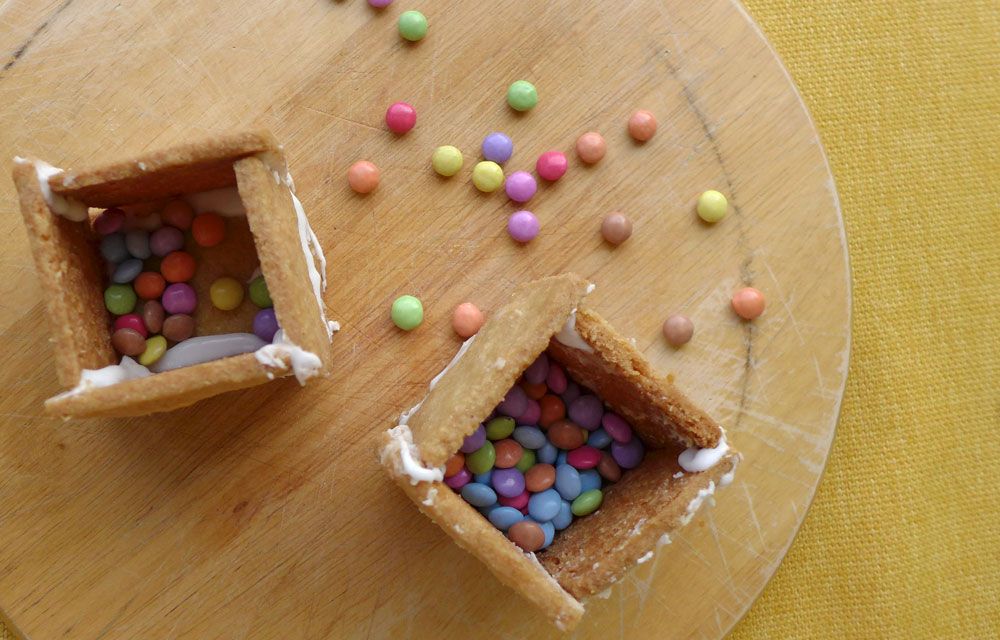 Fill your cookie boxes with candy. I din’t fill them up to the top, because I was afraid that my (still somewhat fluid) icing wouldn’t hold it. As explained in my introduction, you can use anything you like to fill these cookie presents up. However, I like the bright colours of smarties. I think they make the cookies more festive.
 When you’re happy with your filling, glue the lid on top. With glue I of course mean icing. Please don’t use glue and get your loved ones sent to a hospital. Unless of course it’s all in your evil plan to escape Christmas from your weird family.
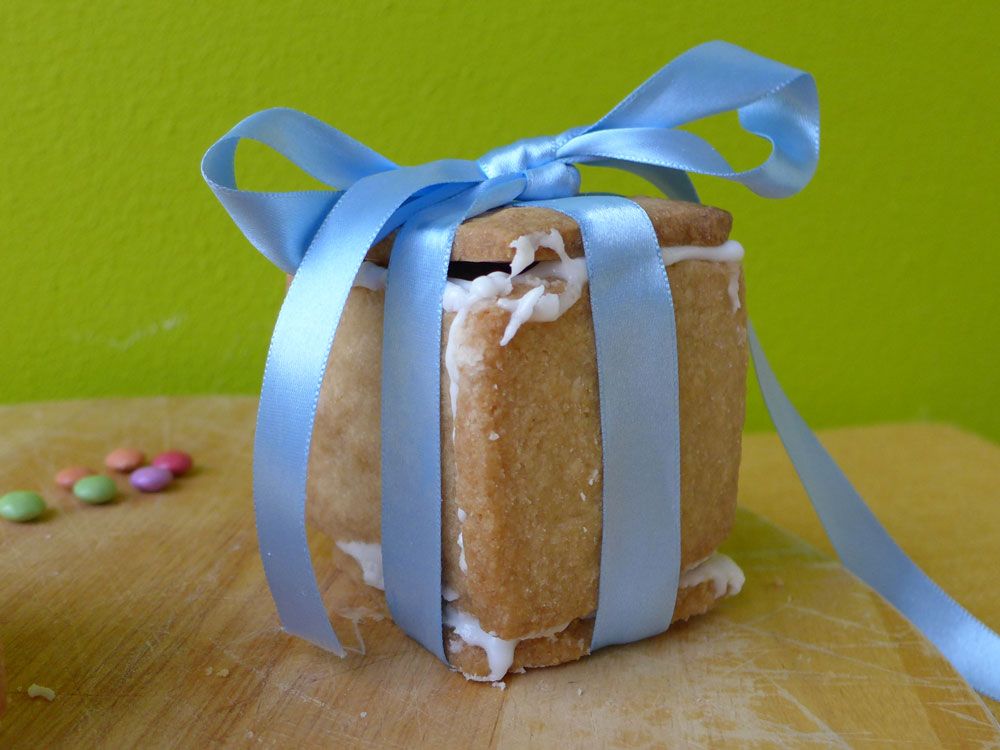 For a finishing touch, carefully tie a bow around your cookie cube. This was the moment in which I was running around a house full of scattered supplies, while tying my shoes, grabbing my bag, and quickly taking one last picture before stowing the cookies in my bag and praying that they would not crash before I would meet my sister (in retrospect, I don’t think this picture was the best angle). Oh, blogging life behind the scenes… (on that same note here is another fun fact: the top image of this post was made in a moving train)
What would you put inside? Any fun ideas I haven’t mentioned?


Get the FREE E-Course 'Creative ReBootcamp' to Awaken your creative dreams in 5 days!
& receive uplifting updates per email